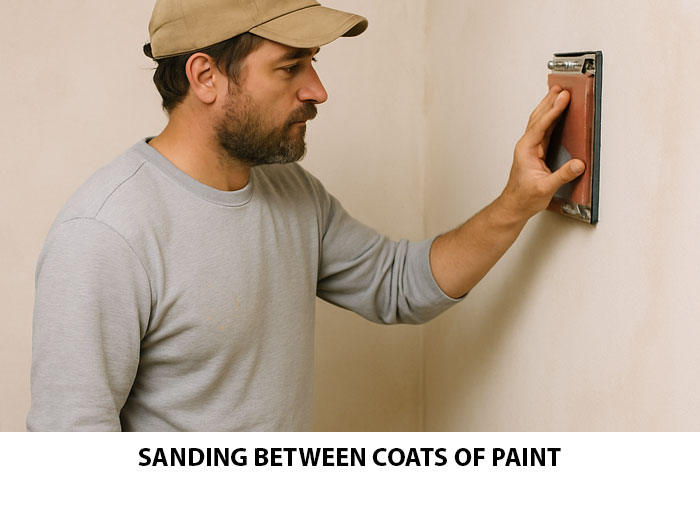
People ask us about sanding between coats of paint all the time. You want to know if you need to do it. First of all, it won’t harm anything to sand between coats of paint. So, it’s safe to do it. That being said, you don’t want to waste your time doing it if it’s not required or beneficial to your home paint job. In this guide, we’ll walk you should do it, when it isn’t needed, and more!
When Should You Sand Between Coats Of Paint?
Sanding isn’t the most exciting part of the painting/home remodeling process. But it’s a total game-changer in how it will make your walls look. If your walls are flaking, bubbling, or just flat-out look bad, you should definitely be sanding and smoothing it out before applying your first coat of paint.
Sanding isn’t just about cleaning up an old mess. It’s also about giving your surface the right texture for the new paint to hold on tight. You can think of it as giving your paint something to onto instead of sliding around like it’s on ice.
And yes, sanding between coats of paint is the way to go here! It might seem like overkill, but it’ll help you even out imperfections, smooth out brush marks, and make that final finish look extra nice. Just remember that not every project needs the same approach. Some situations call for a light touch while others call for more elbow grease. Knowing when and how to sand can be the secret to a flawless finish.
What Kind Of Paint Are You Using?
The kind of paint you use can completely change the game when it comes to whether or not sanding between coats of paint is necessary. Some paints are clingy, in a good way, and stick to surfaces effortlessly. Others? Not so much. They need a little help from a roughed-up surface to really settle in.
For example, if you’re painting something smooth and glossy like bathroom trim or kitchen cabinets, you’ll definitely want to sand between coats. Glossy finishes are known for repelling paint unless you give them a little texture to hold onto. But if you’re using a flat or eggshell finish on something like your living room walls? As long as the first coat is dry, you’re likely good to go with the next coat—no sanding necessary.
Now, if you’re tempted by budget paint, keep in mind that cheaper options often come with streaks, drips, bubbles, and regret. They just don’t lay down as smoothly. But the good news is that sanding between coats of paint can fix a lot of those issues and smooth things out. In the end, it’s a small step that can rescue your project and make it look way more polished.
Where Are You Painting?
Sure, sanding can be a hassle with dust flying everywhere, arms getting tired, etc., but the payoff is real. That extra effort often means the difference between a “good enough” paint job and one that looks professionally done. If you’re after that sleek, polished finish, a little sanding can go a long way.
Now, for most interior drywall jobs, you can usually skip the sanding between coats without any major regrets. A few small roller flecks or specks won’t be obvious once everything’s dry, especially on walls that already have a bit of natural texture. But here’s the exception: if you’re painting something that’s going to be in direct sunlight or under bright overhead lights—think cabinet doors or hallway walls that catch the afternoon sun—you’ll want to sand between coats of paint to avoid seeing every last imperfection.
The bottom line is that you don’t have to sand every single time, but knowing when to do it can make all the difference in how your finished project looks.
The Length Of The Project
Sanding between coats can either feel like a quick touch-up or a major time commitment—it all comes down to the surface you’re working with. If you’re painting something smooth and flat, get ready to sand the whole thing evenly, which can eat up a good chunk of your day. But if you’re working with a textured surface, you might only need to smooth out a few bumps or problem spots here and there. Much easier.
Don’t forget about dry time, either. You’ll need to give your paint at least 24 hours to fully dry before sanding or applying the next layer. That alone can stretch your project timeline by a few days, especially if you’re trying to be thorough.
If time’s on your side, then yes, you should sand between coats of paint, and you’ll enjoy a cleaner, more professional-looking finish. But if you’re racing the clock, it might come down to a tradeoff: do you want perfection, or do you want it done fast? Sometimes, you just have to pick your battles and go with what works best for your schedule.
What Grit Sandpaper Should You Use Between Coats?
Choosing the right sandpaper can make or break your paint job. For most interior projects, go with something in the 180 to 220 grit range. That ultra-fine texture smooths things out without being too aggressive, making it a solid pick when you sand between coats of paint. If you’re working on something that requires a polished, high-gloss finish—like furniture or cabinetry—then bumping up to 240 grit or higher might be the way to go.
Once you’ve done your sanding, don’t skip the clean-up. That fine dust might seem harmless, but if you leave it sitting on the surface, your next coat of paint won’t stick like it should. Grab a dry cloth or tack rag and give everything a good wipe down before moving on. That one simple step helps your second coat go on smoother and last longer.
Other Tools You’ll Need
If you’re planning to sand between coats of paint, having the right tools on hand makes the process smoother, faster, and a lot less frustrating. Here’s what you’ll want to grab before you get started:
- Fine-grit sandpaper (180–220 grit) – Ideal for smoothing walls and prepping for that next coat.
- Drywall sanding pole – Great for reaching high or wide areas without killing your back.
- Sanding sponge or sanding block – Perfect for edges, corners, or smaller touch-up spots.
- Tack cloth or microfiber rag – Use this to wipe away all that fine dust after sanding.
- Drop cloth or plastic sheeting – Helps keep dust from coating your floors and furniture.
- Dust mask or respirator – A must if you’re sanding indoors to avoid breathing in fine particles.
With these tools, you’ll be ready to sand between coats of paint like a pro, and your finished result will show it.
How To Do It
Sanding between coats of paint can mean a full-on wall session or just a quick touch-up—it all depends on your surface and your standards. If you’re after that flawless, showroom-quality finish on a smooth wall, go ahead and sand the whole thing. A drywall sanding pole makes this way easier and saves your arms from total exhaustion. But if your wall has some texture or you’re not chasing perfection, just hit the problem areas, such as bubbling, streaks, or uneven patches, and move on.
Want to keep things looking sharp without slowing your progress? Spot-sanding can be the sweet spot between speed and quality.
Here’s a solid tip: sanding between coats of paint might not be necessary for every job, but if you’re working with polyurethane on raw wood or stained surfaces, don’t skip it. That extra pass with fine-grit sandpaper makes all the difference in how smooth and even your finish turns out.
When Not To Do It
There are definitely times when sanding between coats of paint is more trouble than it’s worth—and might even mess things up. For example, sanding between layers of touch-up paint, primer, or clearcoat can backfire. Just because a coat feels dry doesn’t mean it’s fully cured. Sanding too early can smear, scratch, or even peel the surface, forcing you to redo way more than you planned.
That said, once your final coat of primer has dried completely, go ahead and give it a good sanding before you roll on your base color. That step helps your color coat go on smoothly and evenly. But don’t waste your time sanding between primer coats—you won’t see any benefit, and it’ll just slow you down. Stick to the steps that make a difference, and save your energy for the finish that really counts.
The Sanding Between Coats Of Paint Conclusion
Sanding between coats of paint is usually a benefit, but it isn’t always necessary. We always recommend evaluating your circumstances, considering what kind of paint you’re going to use, and the surface. If you need a professional painter, we know of companies across the US, including painters in Tucson and Sacramento home remodeling companies. We even know of Utah masonry companies!


Leave a Reply